My printmaking plates: pronto (lithography), woodcut, sintra (intgalio).
Printmaking seemed like a fun medium to explore for summer. I was drawn to the idea of creating multiple images from a single design. Over the six week course, we tried intaglio, lithography, and woodcut printmaking. The processes vary in plate type, ink density, and method. The common denominator of all three methods was elbow grease: tedious inking processes, proofing, pressing, and clean up. The reward was always peeling the freshly printed paper back from the plate after putting it through the press to discover the unique nuances of the print.
We used a simplified lithography technique. Instead of using giant stone plates, we used thin sheets of polyester called “pronto platesâ€. The process was further demystified in that we created our images using ballpoint pens or Sharpies! I drew a few images with pen, but also experimented with toner by copying some old photographs onto my plate through the fax machine. Printing lithographs was very complex: a dozen layers of ink had to be built up while keeping the plate constantly wet before even proofing it. Lithograph prints were so clean that they resembled photocopies.
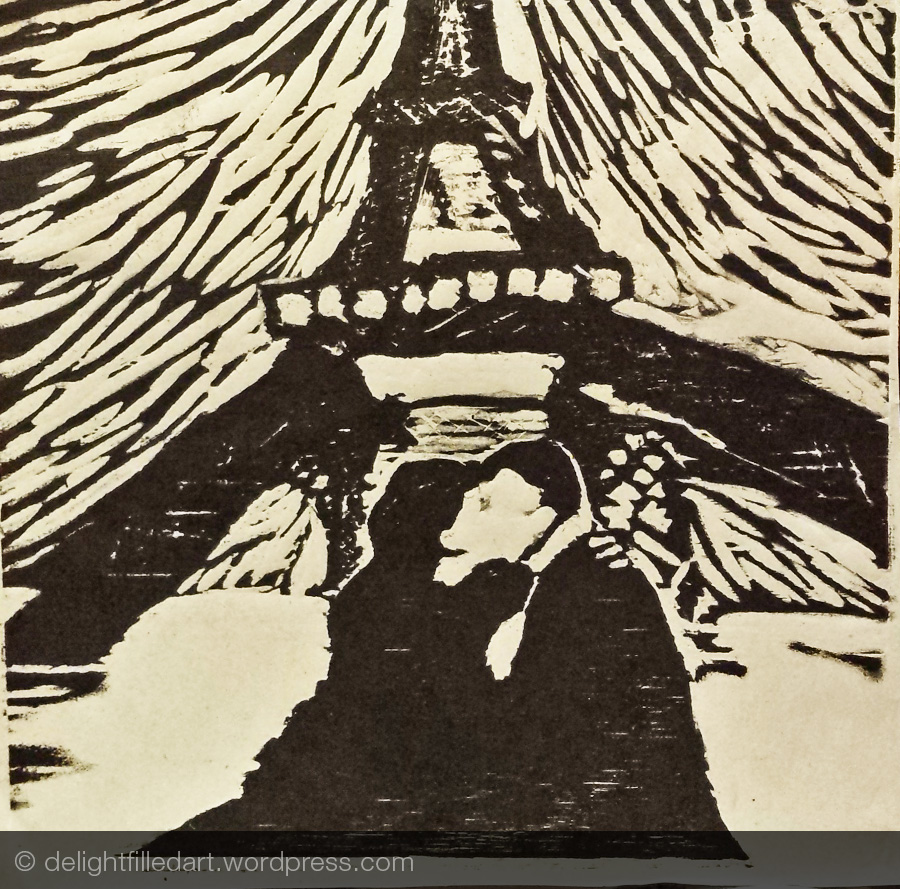
Woodcut involved the easiest printing process, but the most difficult plate to prepare because you have to carve your image into wood. The concept for one of my woodcut plates was based on self-portrait photo we took in Paris, and the influence of Edvard Munch’s “The Kiss.†We experimented with hand printing as well as using the press. My other woodcut was a more abstract mandala shape.
For my intaglio print, I engraved an image into my sintra (PVC) plate based on my memories of a caf̩ in Ile-sur-la-Sorgue, France. I loved all the black iron window rails in France. The experience working with sintra was a bit like drawing with invisible ink Рit was hard to see what I was doing because the indents were barely visible on the white surface.

Leave a Reply
You must be logged in to post a comment.